Wednesday 29 February 2012

Tips for Eyebrows tweezing

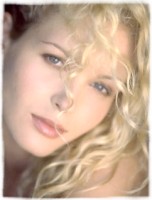
Eyebrows are one of the most prominent features on your face. It is essential to keep them properly groomed. You look better if they appear better. Proper eyebrow shaping can bring about a positive change inappearance. Whether your brows are thin, thinning or bushy, they can be shaped to highlight your best features. It is a fact that people pay a fortune to get their brows done.
First thin the eyebrow and then slowly define the arch. The arch should be at the highest point above the middle of the iris. To determine the beginning and the end of the eyebrows, hold a pencil vertically against the nose. The spot where the pencil meets the eyebrow above the nose is the starting point. Next, tilt the pencil diagonally so that it rests against the far corner of the eye. This indicates the outer point where the eyebrow has to end. To tweeze the brows into the right shape, first use a white eyeliner pencil under the eyebrows you think need to be plucked.
One option in shaping your brows is to tweeze them yourself. Take a cotton pad, moisten it with a cleanser such as Hydrogen peroxide and disinfect the skin around the brows. Wipe the tweezerswith alcohol to make them clean. Begin tweezing with stray hairs under the brows. Hold them one after the other and pull them out in the direction of their growth so that the hair is not broken in the mid-shaft. Ensure that you don't pull out too many so that there is a balance on both the sides. After completing this, wipe the area with Hydrogen Peroxide. Apply a soothing ointment. Tweezing is good but, it will never give the same manifestation as waxing does.
Men are generally not very comfortable with too much shaping. They desire their bushy eyebrows to be cleaned up. You have to choose the right tweezers for your requirement. For grasping small and fine hairs use thin tipped tweezers. The tweezers with slanted tip give maximum control and for removing coarse hairs and a tuft of hair at one time, use square tip tweezers.
For ease, tweeze soon after showering or apply a hot washcloth to loosen the hair follicles. Tweeze under the brow first, plucking in the direction of the growth of hair. If the plucking becomes very painful, apply a pain reliever such as anbesol that numbs the brows. After tweezing, soothe the spot with cool and wet tea bags. This makes the process smooth.

Dark Circles Under Eye

More than 80% of the people around the world have to suffer from dark circles at some part of their life. Some people even suffer from permanent dark circles. The reasons can be many from loss of sleep, avoiding meals, diet deficiency or even sun exposure. Hereditary problems are also responsible for dark circles around your eyes.
Solutions for dark Circles under your Eyes
Below is some time tested and perfectly safe solutions to the problems of dark circles. These are safe and free from any harmful effects as you need to take special care for your eyes due to its sensitive nature. One should be careful while applying anything around your eyes. Due to this we suggest some of the best natural and safe solutions.
>> Cucumber
Clean makeup and cut thin pieces of cucumber and chill them in fridge. Apply round and thin slices of cucumber over your eyes. Keep your eyes shut. Relax and leave the cucumber on your eyes for 15 minutes.
>> Ice Cubes
Ice cubes are usually used on dark circles around eyes which are caused due to scorching sun. The dark shadow around eyes is due to the heat and pollution that is faced when one go out of their house in full sun. Take a small piece of ice cube of enough size to cover eyes. Place it over eyes and leave it for few minutes. This helps in lightening the dark circles around your eyes.
>> Green Gourd
Do the same with the green Gourd. Follow the same procedure that you did with cucumber and you will find beautiful eyes without dark circles. Of course all this will not happen in a matter of seconds but will take some time, meanwhile you can continue with the same procedure as a daily routine for best results.
>> What more can you do?
Follow a certain guidelines that will help you keep your eyes safe, natural and beautiful.
  • Take enough sleep in the night. Forget all those late night schedules.
  • Before going out in the sun make a habit to use the sunscreen lotion to protect your eyes from sunscreen lotion.
  • Have plenty of water all around your eyes which can make you sure that you get what your eyes need to be healthy and in good condition.
  • Take a lots of fresh and juicy fruits and vegetables. Increase the amount of intake in your daily diet.
Follow above remedies and we are sure that it will give relief from dark circles under eyes. For immediate results one can apply makeup face. Apply foundation, concealer that can easily hide the dark

Eye Shadow Tips

Everyone needs a few good eye shadow tips every now and then. Those that are looking for a great looking result from their eye shadow products will find it if they learn how to apply eye shadowin the proper way and how to keep it looking great. Like any other type of makeup, the eye shadow that you select should match your style, your skin color and your budget. Luckily, there are so many choices on the market that you are sure to find many options to select from for that perfect look.
Here are some eye shadow tips to call your own.
  • Don�t over do it. The first rule of applying eye shadow is not to over do the amount that you apply. You want a great look for your eyes but you do not want to turn into an old lady with layers of eye shadow on your eyes. Instead, go for a minimal look and it will pay off with an amazing look.
  • Dark or light? There are many ways in which to apply your eye shadow. Most will apply a darker shade of eye shadow to the area right above the eyelashes. Then, right under the eyebrow,apply a lighter color. You can mix and match the colors that fit with your tastes. You can evenapply a thin layer of a darker eye shadow under the eye right next to your lower eyelashes. This will give a more dramatic look.
  • Balance with your eye color. Another tip to selecting the right eye shadow is to select an eye shadow that works well with your eye color. If you have a light colored eye, make sure that youapply a light colored eye shadow to your eye. If your eyes are darker, a darker look will work well. You can define the color of your eye more so with the use of eye shadow if you balance the colors in this way.
  • For a formal look, add a bit of glamour. To do this, just use a shimmering type of eye shadow. Make sure that you have the best colors that will match what you are wearing as well as what your makeup looks like. A bit of shine makes everyone dazzle.
Eye shadow does not have to be overwhelming and ugly! It can be quite beautiful and the perfect way to add a lot of fun and glamour to your look. Apply it right and you�ll benefit every time.

Applying Eye Makeup

Eyes constitute an important part in the body. They are important in more ways than one. Eyes express what words fail to convey. Women want their eyes to be appealing and they have been using make up to accentuate the beauty of their eyes. It has been an age old practice. Here are some tips for eye makeup.
Before applying eye makeup, it is recommended that you use a concealer to screen the dark circles and wrinkles around your eyes. Ensure that the shade of the concealer is a bit lighter than your natural skin tone. Do not use it in excessive amounts. Apply the eye shadow in many thin layers.
Eye shadows are meant to highlight the beauty of the eyes. They are used to create depth to the eyes. If you use dark colors, your eyes may look smaller, while a lighter color will make them appear larger. If possible, use an eye brush to brush the shadow up. To highlight the eyes, add a lighter shade of the same color as the eye make up to your brow bone.
Too much of a shadow or liner will also make the eyes look smaller. While using a lighter color on the eyelid, use a darker color in the crease and a highlighter under the brow. This helps in creating illusions with eye shadows. If the eyes are small, don't use too much shadow or liner � it will make your eyes look even smaller.
For large eyes, wear darker shadow on the lid and extend it to the crease. Use a flat color to highlight under the brow. If the eyes are deep-set, use light colors under the skin and the brow and a medium color under the crease. Accentuate the outer corners of the eye with shadow. For wide-set eyes, use darker colors on the inner corners with shadow.
Take an eyeliner pencil and outline the top and bottom of your eyelids. Instead of a straight line, make short, small sized close dots with the eyeliner. Smudge the dots or the line lightly from the inner corners to the outer corners, for softer line. For the eyelashes, first use the eyelash separator comb. Then apply thin mascara. If you don't have many lashes, apply the mascara individually and re-comb your lashes. Allow the lashes to dry and repeat the process.
Remove the eye makeup with a cotton ball or swab soaked in makeup remover. Otherwise, you may use makeup remover pads, which are also good. Be gentle and don't rush. Be careful especially while removing mascara. You can gently rub the underside of the lashes until they come off completely.
Useful eye makeup tips:
  • If your eyes are set too close to each other, put a dark shade like triangle acroos outer corners of the upper eyelid.
  • If your eyes are placed too wide apart, add a blend of eye shadow across the inner halves of the upper eye lid towards the brow line. Add a slanting shadow on outer corners of the lower eyelid.
  • Take a piece of cotton wool, dip it in solution of witch-hazel and use it as eye pads.
  • To give a fresh look to your eyes, use a ball of cotton wool immersed in milk on top of your eyes each time you go to bed at night for 2-5 minutes.

Laying The Foundation

Make up can be a tricky thing. Not everyone knows how to properly use the tools that they have to get the best results possible. No matter how much make up you will be piling on, or how little, starting with the foundation is essential. There are plenty of products that claim to be right for you, but you can find a good range of products that are not expensive but are beneficial to you.
The foundation for our make up needs to the first thing that goes on and therefore must be the most well chosen product for your face. To help you to get the best foundation possible, consider these tips to getting there.
  • First things first, you need to prepare your skin for make up and your foundation. To do this, make sure that it is clean. You should always remove your make up each night so that your skin and your pores stay clean. This is essential for your future applications to be beautiful and perfect.
  • Next, select the right foundation for your skin. This is a bit difficult, but you should take some time to find the foundation that is as close to your skin tone as possible. Look for products that are not going to cause an allergic reaction to you. Don't be tempted to go with a darker shade because you want to look like you have a tan, as it always looks bad in the end.
  • Did you know that you do not have to put foundation on your entire face? In fact, you should only apply it where you need it. This way, you avoid those annoying streaks that end up on your neck and chin line. Apply to the areas that are in need.
  • Once you apply the foundation to your face, you will want to use a powdered cover up. This will allow you to get a better result from the foundation. It will also keep the foundation in place.
  • Finally, apply make up to your face as you normally would. The foundation will be in place to allow you to have the best look for your needs.
Foundation is available by several manufacturers. They provide you with the overall simplest way to cover up blemishes, to cover up your uneven skin tones and provide you with a great place to start adding skin tones with.

Makeup and Art of Dressing

Makeup and Art of DressingWe begin our life with a soft and smooth skin. Once we reach our 30s, our skin is not the same. We generally take skin (largest organ of our body) for granted. Skin can get tired if not looked upon properly. Understanding your skin will help you take better care of it. Before going through the art of dressing and makeup better have a look at our skin care section first.
Dressing up is much more then applying makeup. It is an art and science, which requires knowledge, spirit of adventure, courage to experiment, sense of color, perseverance and finally desires to look good. Looking good is not that tough and we would let you know everything required for the purpose in this section.

Vampire Makeup

Vampires are a traditional, popular look for Halloween especially this year thanks to "Twilight" and "New Moon." Could there be anything more frightening than bumping into a vampire on this particular night? Here we show you three steps to do vampire makeup for Halloween.

Step 1: Prep the face

An extremely pale face is a must here. You must look as if you have never stepped out into the sunlight. I suggest using foundation from a costume shop meant for other deathly costumes.
Before applying any type of face paint, I suggest slathering your face with a foundation primer or moisturizer. This keeps makeup from appearing cakey, especially if you have dry skin.
Apply a puff of powder over entire face to keep it in place. You can use white baby powder here to keep the white effect.

Step 2: Apply the eye makeup

For the perfect vampire makeup, you want a smokey eye. The trick here is to use eyeshadow for the smokey bits, over an eyeliner.
You can choose a dark gray, brown or black or have fun with aubergine. Any dark eyeliner and eyeshadow will do you. Apply eyeliner on the inside of eye, on the top and bottom. Then take a dark eyeshadow and apply around the perimeter of the eye. Blend well.
If you really want to go all out as a vampire, pop in fake contact lenses. You can order them online or get them in costume shops.

Step 3: Now have fun with the lips

Vampire lips aren't supposed to be perfect. But they are supposed to be red. To get this look rub lipstick on your finger and press into lips. The "stain" will look authentic. Don't forget to put in your fangs and you're ready to go.

What is Threading

Threading is an ancient Middle Eastern technique that is becoming common in the United States with threading shops popping up in every big city as we speak. Many of the top beauty editors in NYC get their brows threaded rather than waxed. (I am a big fan of the thread and get mine done in a little shop in the subway at Rockefeller Plaza).
How does it work? An aesthetician uses a doubled-up strand of cotton thread to twist around individual hairs, then pulls them out from the roots. The procedure is used mainly on the eyebrows and upper lip.
Threading is faster than tweezing. The average eyebrow procedure takes about 5 to 10 minutes, while tweezing takes about 20 minutes.

Eyebrow bleaching

If you recently did a bleaching of your hair you may have noticed that your eyebrows might look a bit too dark. Eyebrow bleaching will fix this problem. First of all, and this is extremely important: Do not under any circumstances use hair color or hair bleaching to bleach your eyebrows! These products are way too strong to use anywhere near your eyes.

Eyebrow bleaching products can be bought in cosmetic stores as well as on the Internet. Usually you will need two different products for this purpose - eyebrow bleaching paste and developer cream containing peroxide. Mix these two according to the manuals of the specific products. Make sure that none of these substances come in contact with any clothes or other textiles. You might want to do a skin sensitivity test before you start.
First of all, use a make-up remover to remove any make-up on your eyebrows. If the remover contains oil, make sure you get rid of that completely before you start applying the bleaching.
Apply the mixed paste/developer on your eyebrows. If you have thick eyebrows it's important to cover all the hair underneath the upper layer of hair. Otherwise the part of the eyebrow underneath will remain uncolored.
Be careful not to get the bleaching in your eyes.
At the end of the application time (see bottle/tube for instructions), remove the paste with a dry cotton ball. Then use a moist cotton ball to remove any excess and finally use a make-up remover.

Normally the result of the bleaching will last up to six weeks.

Getting the exact right color can be a little tricky though. Eyebrow bleaching can be very aggressive and often you will end up with completely blond eyebrows. You might want to use an eyebrow pencil to fill in your eyebrows with the exact color of your desire. Yes, eyebrow pencils, if they're not too soft, can actually be used to color the actual hair of your eyebrows.

I would advice against using permanent eyebrow color on bleached eyebrows because the bleaching makes the hair extremely receptive to color with the result that they will turn black. Any hair that has been colored with permanent color can't be re-bleached until new hair has grown out (which usually takes 4-6 weeks).

Get fabulous cheeks

If you already have round and clearly visible cheeks, follow the general tips above. But if you have a flat face, try this:


First of all, make sure you have applied foundation to eliminate any red marks on your cheeks.
Find the highest point of your cheek, the tip of the cheekbone. Look at where the highlight appears in different lights. Imagine a highlighted line across your cheek.
Apply blush right below this line upwards and outwards. Start on the middle of the cheek (horizontally). Make the line thicker until you have a half-moon shape.
Leave the highlight area uncolored and make another line right above it, parallel to the lower line. Don’t apply any blush to the circle under your eye. If you’re very close to it, make the line thin.
Remove any excess from the brush and use it to smoothen out the highlighted, uncolored area. The transition between the highlight and the half-moon and upper line should be very discreet. If the highlighted area is still uncolored, apply a small amount of blush to it, just so that it remains brighter than the upper and lower line.

How to apply blush

The cheeks are extremely important in modern beauty. According to world-famous plastic surgeon Dr. Francis Palmer they account for 75% of facial beauty. He claims that the ideal cheeks on a woman are “full, round and low to the face”. Unlike him, I don’t think the cheeks matter that much – Cat Eyes, balanced face shape and good-looking eyebrows are just as important, but you should definitely put down some effort here if you don’t have Hollywood-perfect cheeks already.

All other make-up sites on the Internet and in magazines are offering about the same advice for applying blush to the cheeks:


Apply foundation, eye-color and lipstick before blush.
Keep your blush in the same color family as your lipstick.
Use a big, round brush for application.
Other guides always say: "smile so that the apple of the cheek gets visible – this is where you should place the blush". I do not entirely agree with this. Many women have their "apples" too close to the nose to put the blush there. I would rather recommend you apply the blush from the middle of the cheek, under the cheekbone and outwards. You want to create a shadow, not a big red dot. For more blush application tips, see below.


These tips are really good – if you already have perfectly round and full cheeks. But what if you don’t? If the cheeks are that important and nature haven’t given you this gift, how do you deal with it? Cheek implants? God no! We want to know a magic way! I searched for weeks but I couldn’t find a single tip on how to actually alter the shape of the cheeks. So I had to figure out my own.

Tuesday 28 February 2012

Best Weight Loss Supplement

Obesity is a major problem in these days; many weight loss supplements for woman can be used to solve this problem. These supplements increase the body’s metabolic rate and burns the body fat and stimulate the mind to eat less, which leads to additional weight loss. Moreover, these supplements also provide high amount of energy for high intensity workouts and burn more calories.
Apidexin is one of the best weight loss supplements for women that can help to lose weight fast. It has a powerful combination patented ingredients that has rich quality of burning excess fats. Decaslim is also a fast acting, powerful weight loss supplement for women  that includes Acai, Green Tea, Flaxseed, Buckwheat, Soybeans and several other all-natural  ingredients. Lipofuze is made of powerful products that have been proven to burn fat and increase metabolism.

Herbal weight loss supplements for women;
Thousands of people are losing weight by using natural herbs and supplements. Herbal weight loss supplements for women are made of natural herbs that are not only effective but are also safe. These supplements reduce the craving for food, thereby reducing the intake of carbohydrates and fats, regulate the body metabolism and help to suppress appetite. LipoSafe is a famous all-natural herbal dietary supplement.
Natural weight loss supplements for women;
Natural weight loss supplements for women are highly recommended by the doctors and health specialists from around the world. Psyllium is a fiber that is used by some people as a laxative. Take a spoonful and mix it with a glass of milk in the morning, 30 minutes before your first meal. Acacia fiber is another natural weight-loss supplements found heavily in Africa and Australia, but also found in Europe. Green tea is a well-known natural weight loss supplements. Omega 3 oil is also one of the proven natural weight loss supplements.

Save Time and Still Look Great

Whether you work full time or have to look after the kids, you may find yourself wishing for more time to spend on making yourself feel gorgeous. Despite the busy lifestyles we’re leading now, there are ways to save time on your beauty routine, whether you want a bit more time in bed in the morning or you need some quick fixes for throughout the day.
A close shave
Rather than the hassle of using shaving cream or foam in the shower, try using your hair conditioner. While your hair is getting some TLC your legs will also be left silky smooth at the same time.
Multi-purpose products
There are plenty of multi-purpose skin care products you can use to save time. For example, using a tinted moisturiser with SPF will moisturise, protect you from harmful rays and create an even skin tone. Or if you’re used to spending ages applying make-up, why not try one of the many all-in-one make-up products that can be used on your eyes, cheeks and lips?

Prepare your hair

If you’re fed up of getting up early to do your hair, you can save time by washing it the night before so it’s ready for styling as soon as you wake up. You’ll appreciate the extra 30 minutes in bed! If you’re prone to greasy hair there are some great dry shampoos around to help soak up excess oil.

Quick drying nails

You may find that nail polishes advertised as being quick drying are not as strong as regular polishes but there is a quick and easy way to get bold colour and avoid chips. After applying your nail varnish leave them to air dry for a couple of minutes. When they are at the stage when you think they’re dry but are likely to mark easily, hold your fingers in a bowl of icy cold water. This will help ‘freeze dry’ the varnish and make them less likely to chip.

Smooth lips

Smooth lips are essential for the perfect pout. By gently brushing your lips with a clean toothbrush you will exfoliate them, leaving them in great condition for an easy application of your favourite lipstick or gloss.

Stay organised

Just as you might plan what you’re wearing for the next day, keeping your beauty products organised will help you save time in the morning, ensuring you don’t waste time searching for your misplaced mascara!

Vaseline

Vaseline can be used for a number of quick-fixes. As well as soothing sore lips, Vaseline can also be used to keep cuticles in good condition, add a glow to your cheekbones or used to tame your eyebrows. It’s definitely a must-have when you’re on the go!

Make-up Tips for Pale Skin

When you are preparing for party, or date or just want to change your day time look you need certain make up at your face. If you have pale and fair complexion with translucent skin type then the selection of right brand and color plays the vital role in your best outer looks. It is not an easy task as with complexion with pale background stands out harshly with incorrect shades. If you apply the following tricks in selection and application of right shade you must get the radiant and gorgeous looks.

SELECTION OF FOUNDATION

Selection of the right foundation for pale skin is the tricky task. Thin layer of light shade foundation is best for the thin pale skin. The areas where the skin get much thinner as near the eyes where the skin get too much delicate and thin as the little blood vessels are seen under the skin. The heavy coverage of foundation at such areas makes the skin damage in long terms. Avoid the darker shades of foundations as these make a look of mask at your skin. The foundations with SPF value of 15 are the good in use for such complexions.

CONCEALER

Apply congealer at the dark circles before the application of foundation. It is important for the pale skin as this type of skin is thin and transparent looking so make each and every flaw more prominent. Make sure that these must be hidden before the makeup with the help of concealed. These also give warmth to the complexion when used carefully.

BLUSHERS

Though the use of blushers make your looks more radiant and more pleasant if correctly selected, the pale skin at the cheeks turned to be rosy if pink or coral shades of blusher is applied at them. At porcelain skin the strong and harsh colors give the artificial looks. For the delicate and feminine look the rosy hues work best and give more confidence in your makeup.

EYE SHADES

Application of eye shades gives the lively look to your make up. At the fair and translucent complexion the eye shades of harsh and vibrant colors not compliment with the rest of your make up. Use of pastel and shimmer shades with natural hues efficiently works with your make up tones.

LIPSTICKS

For the natural and glamorous look use the lipsticks with nude, pink, berry and coral shades are best for the day time make up. For night or evening make up darker shades of above mentioned with classic red lipstick is the best choice for turning the heads towards you .

EYE MAKE UP

Eye liner and mascara are of dark brown shades are good for porcelain skin. These make the eyes more stunning and natural instead of black shades.

How To Treat Dry Hair

Hair normally has a moisture content of approximately 10%. If your hair's moisture content drops below this level the key is to increase the hair's ability of attract and retain moisture. This is accomplished by using moisturizers.
Good ones have "humectants" that not only replace lost moisture but actually attract moisture and retain it in the cortex of the hair. Essential fatty aids (EFA's) are great moisturizers. One of the best and most cost effective essential fatty acids is safflower oil. It is the kind you can buy to cook with. It is rich in EFA's.
The scalp produces the best EFA's called sebum. The problems is once the hair grows past the neck line or does not have direct contact with the scalp the scalps
natural oils can not be utilized throughout the hair shaft.
  • You can manually replace the lost EFA's by:
  • Placing 1 or 2 drops of safflower oil in your palms and rub them together.
  • There should only be enough to make your hands "shine" in the light.
  • Carefully take your hair (while dry) and "scrunch" the small amount of oil to the ENDS first and work toward the scalp.
  • Leave this in your hair.
  • 1-2 drops of safflower oil on dry hair is so small, you won't notice it is there.
Doing the above as often as necessary will ensure your dry hair will have the proper amount of humectants to attract and reatin moisture. The key is that a small amount will go a long way.

Straighten Your Hair

Do you want to strighten your curls? Here's how you can;
  • Wash and condition hair. Blot dry. Hair should be almost dry when you begin.
  • Gather up hair into several sections and secure or clip hair on top of your head. You will be drying the bottom layers first.
  • Follow the brush (with your dryer) down the sections of hair as you straighten each section and be sure to keep the dryer moving.
  • Take down a new section of hair and procede as directed above.
  • Work your way up the layers until all sections are dried and straightened.
  • To curl the ends for a polished look, take your brush and pull the ends under. Finish your styling with a blast of cool air if your hairdryer has this capability.

Be sure to condition your hair often. Sun, cold temperatures plus the use of your hair dryer can be hard on your hair. For best results, use products formulated for your hair type. It does make a difference. Give your hair a break and allow it to dry naturally as often as possible. Have split ends snipped every six weeks to two months to ensure that they don't travel up the hair shaft.